
What’s your photography style?
When I first started, if someone had asked me that question, I’m not sure how I would have answered! I think it takes some time trying different things to find out what really feels like you. For me, I found that as I went along, I was more attracted to a brighter look. Now don’t get me wrong, I do enjoy and appreciate a darker, moody image; but it just didn’t feel like the right fit for my business. Images that were light and airy, with a soft dreamy background really had me swooning! So, I set out to evolve a style of my own that would capture just that! This took some time of course, because consistency is something you have to work at. If any of this sounds familiar to you, keep reading! I am excited to share with y’all 3 tips that you can implement at your next session to achieve light and bright images.
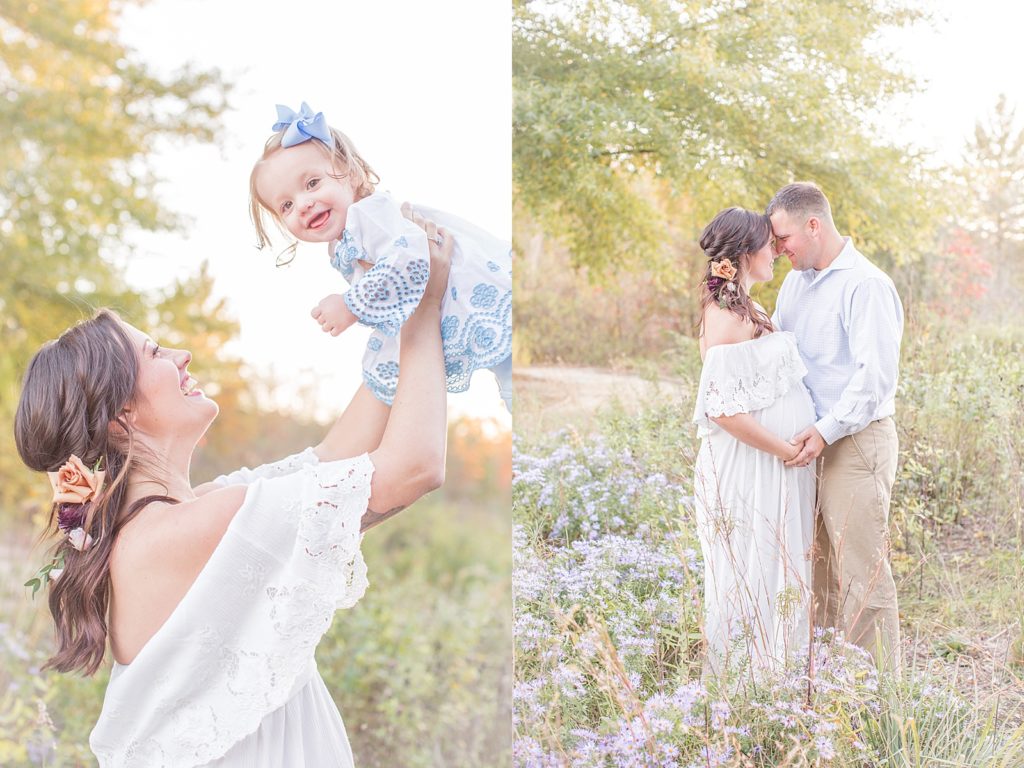
Tip #1: Choose your locations and backgrounds strategically.
This is something that I do at almost every session to ensure my images will have a style that is consistent with my brand. This is super important, because when clients book with you, they are booking based off what they have seen from you on your website, portfolio, social media etc. A consistent look to your images will allow clients to feel more comfortable booking with you, because they will trust in what style of photos they will receive. When on location for a session, I am of course looking for the best light, but after that I am looking for a desirable background. Anything really dark, or heavy in the background is going to be a no-go for me. Placing your clients in front of a solid dark fence, or a really dense grouping of boxwood shrubs is not going to best showcase a light, bright image. You want to look for backgrounds that are going to let light through. This may be simply open space, or maybe trees with branches that are wide enough that the sun can shine through. I am also a huge fan of light colored, tall grasses!
Tip #2: Use a wide aperture whenever possible.
If you remember the details of the exposure triangle, you know that aperture effects how much light is let in AND how much depth of field your image will have. Both of these features will work to your advantage when shooting images for a bright and airy style. A wide aperture, which lets in more light, will aid you in creating an image that is bright straight out of camera. Plus, a shallow depth of field, (meaning that creamy dreamy background!), is also achieved with a wide aperture, and will lend itself to a more soft, light image overall.
P.s. You don’t want to risk your subject being out of focus, so just make sure you’re taking that into consideration when selecting the widest f-stop you can use for the shot.
Tip #3: Pull your subjects further away from the background.
In tip #1 we chatted about finding more ideal locations/backgrounds, but we also want to make sure that the subject is pulled away from that background – even if it is an ideal one! I realize that depending on the location, you may only have a certain amount of space to work with, but whenever possible, bring your clients closer to you when you’re shooting. The further away from the background the subject is, the more shallow your depth of field will appear in the image. When the background has that soft, dreamy blur to it, the image as a whole will feel more light! (This goes hand in hand with tip #2). This means that instead of asking your clients to stand right in front of a little grouping of trees (that have nice light coming through the branches, of course!), it will be more to your advantage to ask them to stand about 5 feet in front of that grouping of trees. When you’re on location you may have to work within the constraints of space at times, but you get the idea!
Bonus tip: Use post-processing to your advantage.
Even after following all of the tips mentioned above, I still take steps to create lighter, brighter images when I edit in Lightroom! Adjusting options such as your overall exposure, the shadows/blacks, and the highlights/whites will help you to perfect the light and airy look.
I hope these tips will be helpful to you at your next session! Feel free to tag #jessbeckereducation on social media with your progress!
xoxo, Jess
P.S. If you enjoyed this post, you can sign up for my education list HERE to receive exclusive content delivered right to your inbox!
filed under
January 24, 2019
POSTED ON


